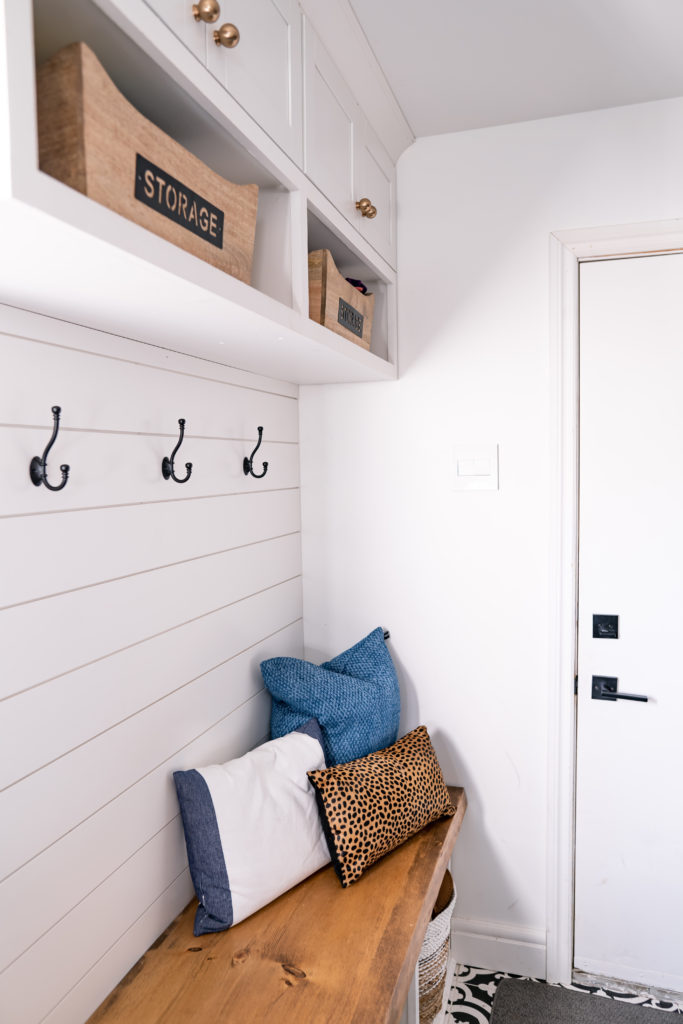
It’s been just over five months since we revealed our renovated laundry/mudroom that we finished during the Fall One Room Challenge (ORC), along with the help of our friends at Lowes Canada. It’s crazy to look back on the pictures and see just how much this space in our home was transformed in only six weeks time! It’s still our most favourite room in the house and because of that, I often find myself looking around the house for more laundry to do just for an excuse to hang out in that space! #truestory
But the truth is, as much as we still love our laundry room, there were quite a few challenges that we ran into during our renovation that we never talked about on the blog. Moreover, there have been some things that either never got fully finished or have actually broken/cracked/stained/not functioned quite as we thought it would since the big reveal.
It takes all of five seconds of scrolling on Pinterest or any home decor hashtag on social media to see that 99.9% of the posts out there about home renovations are all showing the beautiful, finished product. I’m not saying there is anything wrong with that as it serves as inspiration for other peoples spaces. But while you might get progress pictures, which is one of the things I love about the One Room Challenge, I often have thought that there should be a seventh week (the ORC is six weeks to transform on room) as a follow up where we can talk about some of the challenges and share anything that went wrong with the renovation as a more realistic representation to potential home DIY’ers out there that it isn’t always picture-perfect.
So today, with the Spring 2019 ORC starting up, and before we share all about the new space we will be renovating, we thought we would share with you some of the lessons learned, the unexpected challenges we encountered and how it’s all holding up five months later.
1. HVAC & Plumbing in Walls
“I don’t think there’s anything in the walls” – Chris Martin
These became his famous last words on this project as he not once but twice assumed there was nothing in the walls, tearing them down, only to realized there were in fact HVAC and plumbing pipes running through them.

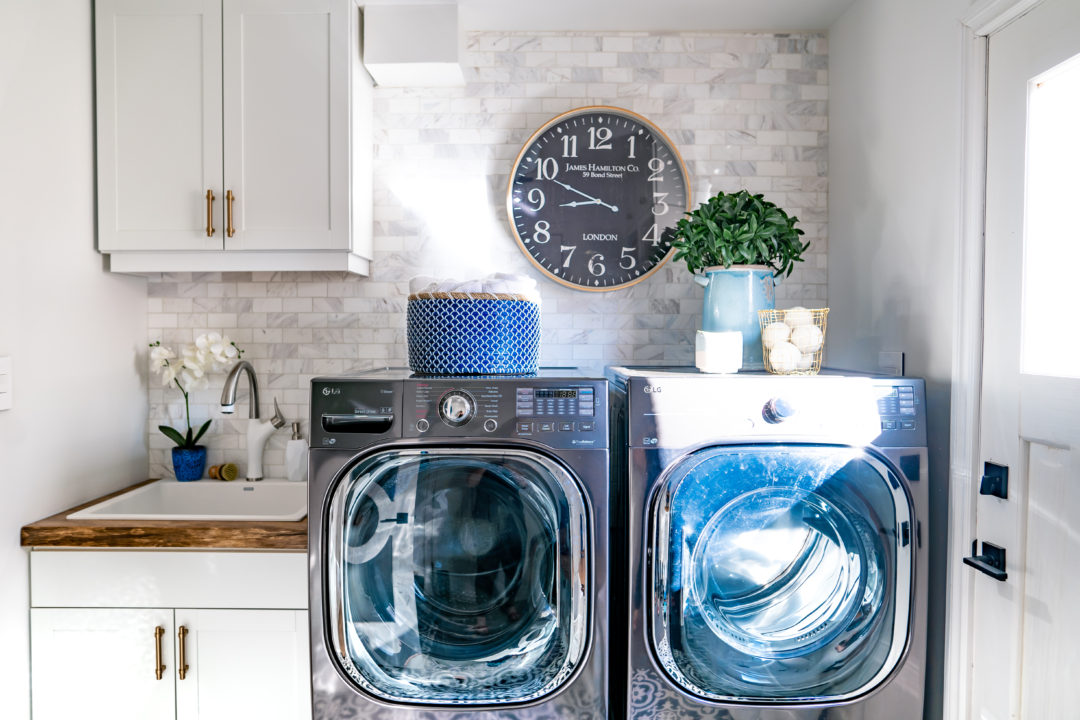
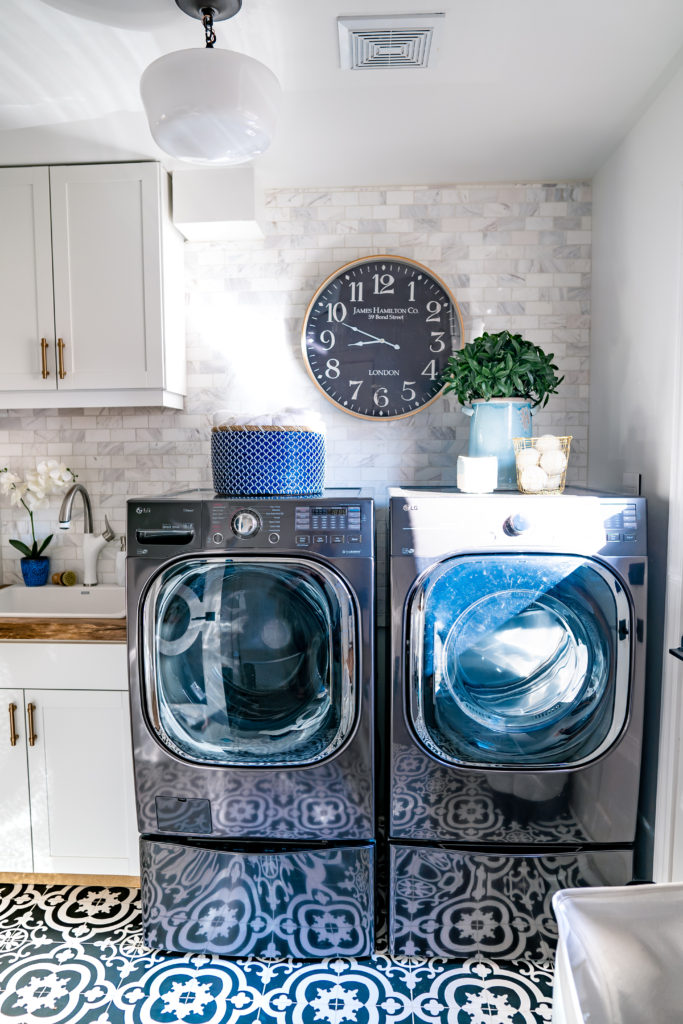
The first pipe we discovered was above the laundry machines. We removed an entire row of upper cabinets and then wanted to gain a bit of height so Chris decided the bulk head above the cabinets should come down as well. After some initial investigation, he was convinced there was nothing in there. You can actually see the moment he discovers the plumbing in THIS Youtube video (timestamp 4:50)
We weren’t 100% sure what to do with it, so Chris just built a small wood frame to go over it and then drywalled it. Do I love the way it looks? Nah. But was a decent solution to our problem? For sure. And that’s sometimes what happens in design – problem solving on your feet and having to switch up designs on the fly.
The second time we ran into a similar problem was when Chris had the amazing idea to increase the floor space in the laundry room by moving the wall to the adjoining powder room further back. This was honestly such a great idea, until we discovered HVAC pipes running from the basement up to our daughter’s room.
Chris had to become real proficient in HVAC and moving the pipes in order to salvage this challenge, which he totally did, but it did set us back a couple of days as he learned all he could about moving HVAC pipes!
2. Exterior Door Set in Concrete
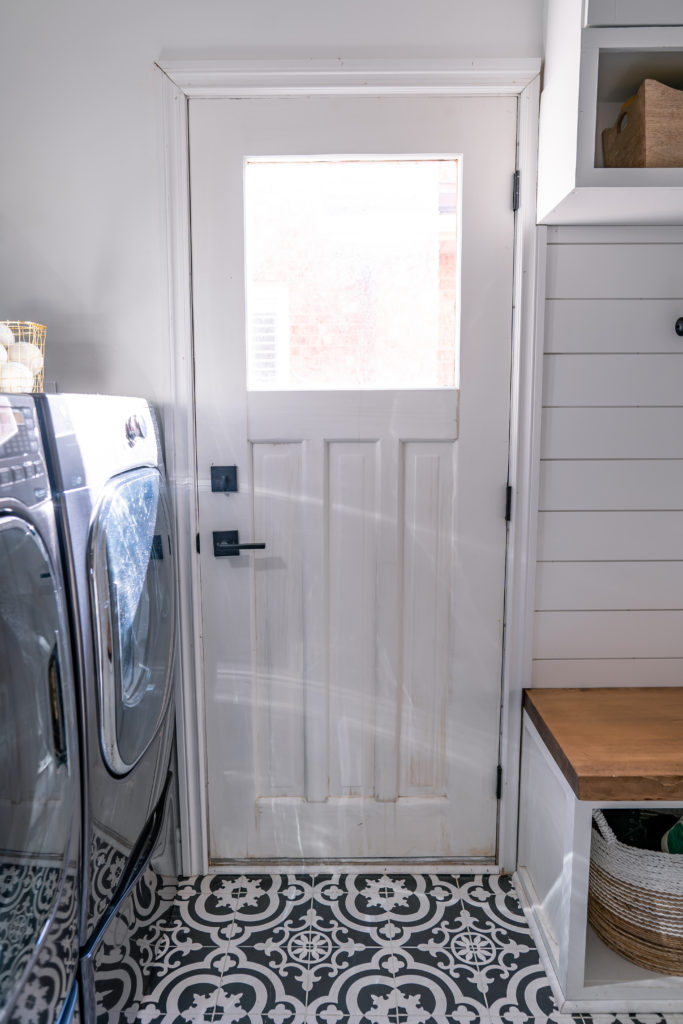
The original plan always included changing the exterior door in the laundry room. The door that was in there before we started was actually an original door to the house, from over 25 years! It was solid wood and not very energy efficient whatsoever.
We found a beautiful steel door with a larger window and were getting ready to install it ourselves. Chris removed the door from the hinges and then went to remove the door casing when he discovered the casing was actually SET IN CONCRETE on the exterior of the home.
We were not expecting this and unlike the previous challenge we ran into with the pipes in the wall, we knew that this was outside of our capabilities and we just didn’t have enough time to get in a contractor to help us solve this issue.
We did try to see if we could get a custom steel door built at the local hardware store, only to discover that isn’t really a thing (or so we were told) and any custom door we would want would take weeks to order in.
So, the solution was to make that original wood door work. The previous owners had a dog who had clearly chewed and scratched the living daylights out of the door, so we had to sand it down tremendously. And then it was time to paint it.
We must have painted six coats and yet the natural oils were still coming through (even though I used a primer). And five months later, those natural oils are still coming through strong! The door looks dirty but it’s really not…it’s just yellowing from the oils.
Our goal is to get a contractor in this summer to properly remove and install our new door, but for the ORC, we had to make do with what we had!
3. Cold Air/Cracked Tiles
It almost pains me to write this, but recently we discovered that a number of our tiles are cracked! *insert crying face emoji* But it’s not just any tiles, it’s a straight line of tiles leading right from that original wood door, so this problem is likely a result of us not being able to replace that door.
A couple of times over the winter months I noticed actual SNOW gathered along the underneath of the door and around the side hinges. Did I mention that was on the INSIDE I noticed this?!
We had our suspicions that this door was not properly sealed and it became very evident the last few months that it wasn’t.
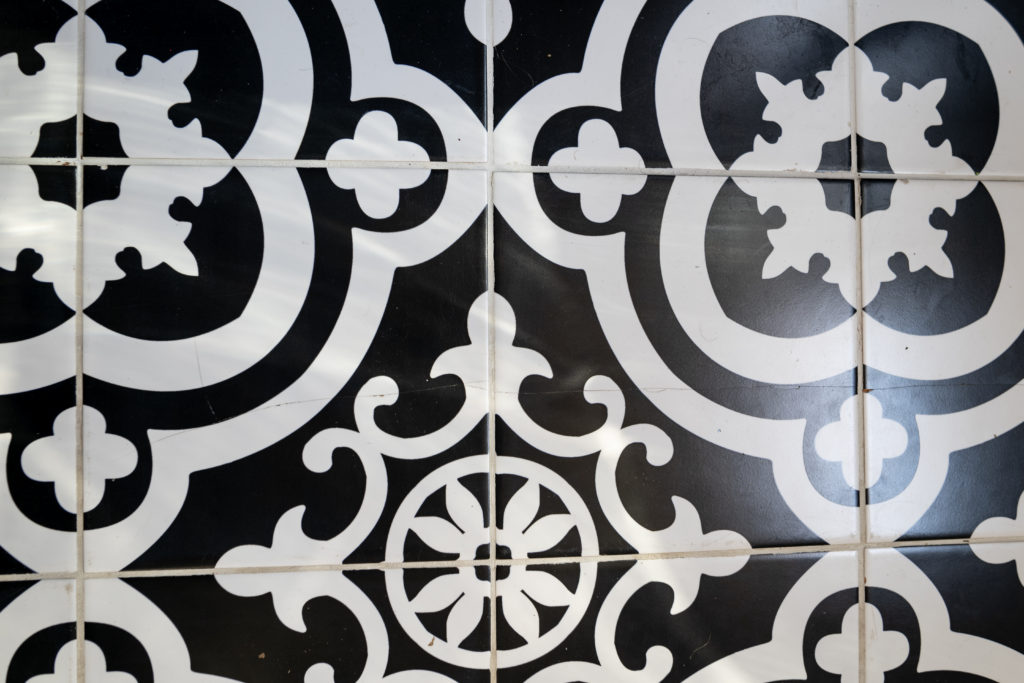
So when I was recently doing laundry and bent down to pick up a sock that had fallen near the door, the crack caught my eye. I followed it all the way to the washer…which is about five feet long.
It stinks, I won’t sugar coat it, but it is what it is at this point and we are going to just wait until we can get the door replaced and then replace the broken tiles at the same time. Because we still absolutely LOVE these tiles and the huge impact they make on the overall design aesthetic in the space!
4. Electrical Outlets
One of the most puzzling things about this house are the light switches all throughout.
For starters, most rooms have fans in them. Whether it’s a full on ceiling fan with a light or a bathroom fan – and they are all operated in different ways – some with switches in random parts of the room and others with remotes. IT.DRIVES.ME.NUTS!
The laundry room is actually one of the worst offenders. Not only does it have about 18 switches in the room, only ONE of them operates the existing light. The main switch for the light is actually OUTSIDE of the laundry room, in the HALLWAY around the corner on the other side of the closet. Truly, the most bizarre set-up I’ve seen. And when you enter the room from inside the home, where you think the laundry room light switch should be, it’s actually the fan switch. Go figure.
We knew we wanted to add another light in the space as it just didn’t feel bright enough with the one light. But because the light switch situation was SO messed up, there was no way to wire it together without having to rip out more drywall in the hallway to access that main switch.
So we ended up putting the second light on it’s own circuit, which is really weird, but kind of fits with the room! Something you’d never know just looking at these pictures, but if you ever come for coffee, I can show you the song and dance that is the light and fan situation of the laundry room!
5. Hanging Rod Placement
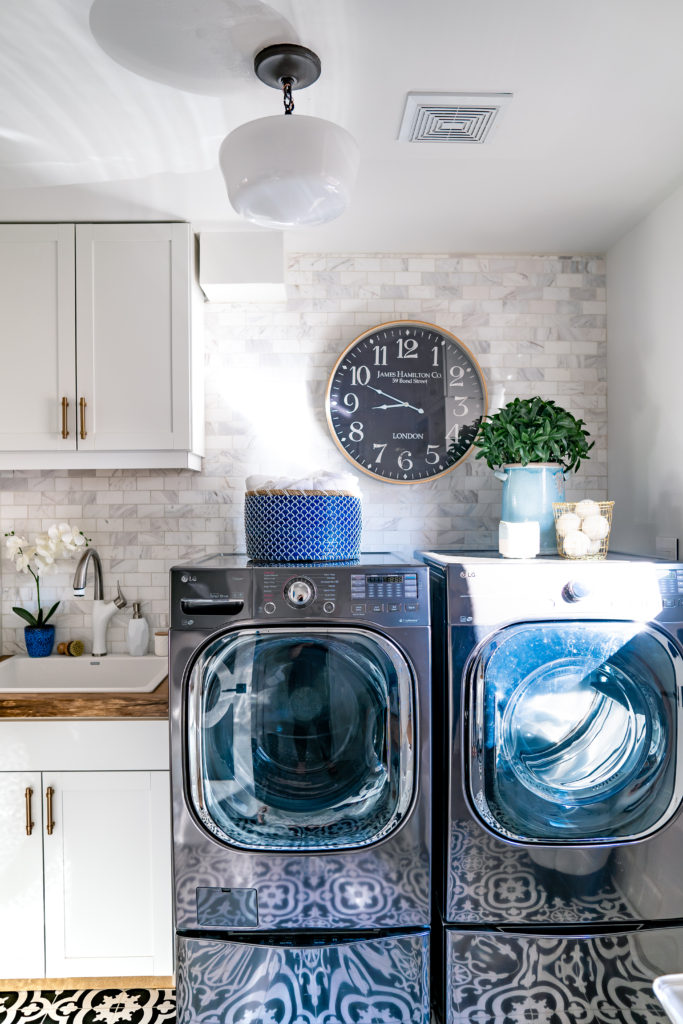
If I’m totally honest, I had originally planned something else for a hanging rod. We were originally going to build a counter top over the washing machines and then place a rod from the one upper cabinet over the machines to the outside wall.
But then when partnered up with LG and they ended up sending us the most amazing TWINWash machines that were on pedestals. As soon as we got them in place I knew there was NO WAY we were building a countertop over them, let alone a hanging rack above them. My short 5’4 frame wouldn’t ever be able to reach!

This happens SO MANY TIMES in design – you have an idea, you make a plan and then when it comes to executing it, you have to pivot. Whether it’s because something structural got in the way or perhaps you couldn’t find exactly what you were looking for, I can’t tell you how many times my designs have changed ON THE SPOT.
So once we realized the hanging rod/folding table situation wasn’t happening over the machines, we had to get creative.
And I’ll give all kudos to Chris for this idea – that’s when he came up with the idea to tear down the wall to the powder room and gain some square footage that way. Not much space, but the perfect amount for a narrow folding table (which, btw, we used UPPER cabinets for on the floor!) We weren’t sure what to do about a hanging rod and then I came up with the idea to hang it from the ceiling!
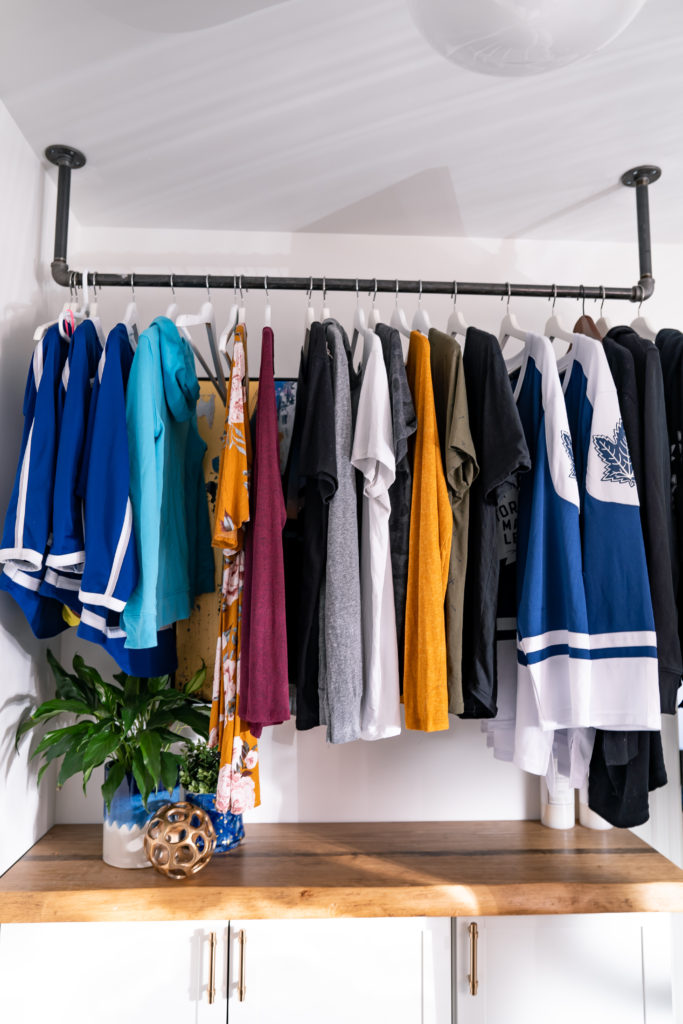
But this isn’t where the complications ended. Chris managed to find all the pieces and built it one night while I was fast asleep. But one thing we failed to remember in our calculations was that beautiful piece of artwork I had for that wall. You couldn’t fit a hanger in front of the artwork.
Chris obviously tried to tell me to ditch the artwork, but as you can see from the pictures, we know who won that argument right?! 😉 But seriously, that artwork was magic and added much needed colour and pizazz to the space, so she wasn’t going anywhere.
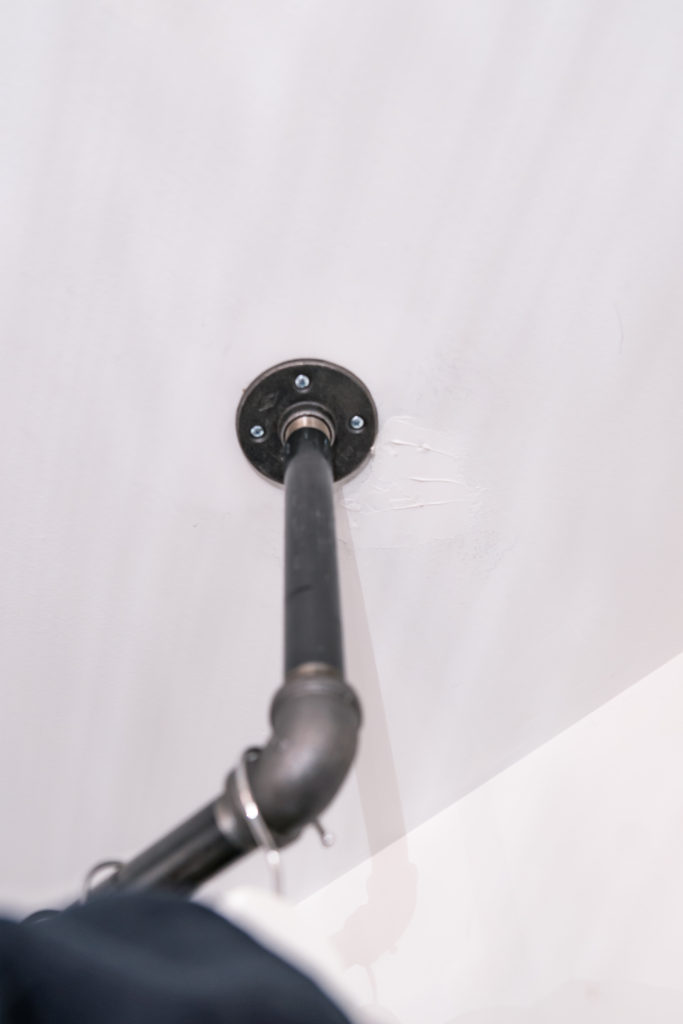
Chris eventually accepted it and moved the rod three inches out, but as you can see, we still haven’t finished up the patchwork! LOL!
6. Finishing Work
The final steps in any home renovation like this is all the finishing work. Chris and I have talked many times about this project – what we loved, what we learned and what we wouldn’t try to tackle again.
And while Chris is amazing at just about everything he puts his hands to do, admittedly, he doesn’t enjoy nor thrive at finishing work. It’s very persnickety (his word), time consuming and requires precise cuts. He can do all of that and has incredible patience, but a large part of the issue we faced in this room specifically were twofold: 1. Curved walls and not level doors/floors and 2. A dying saw, which makes precise cuts very challenging.
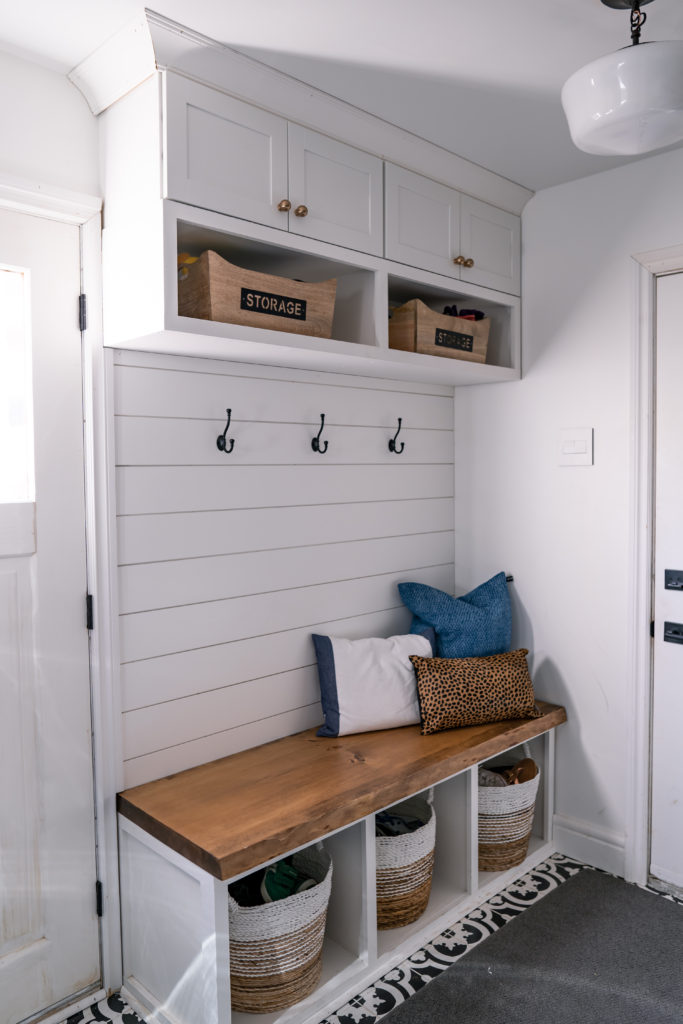
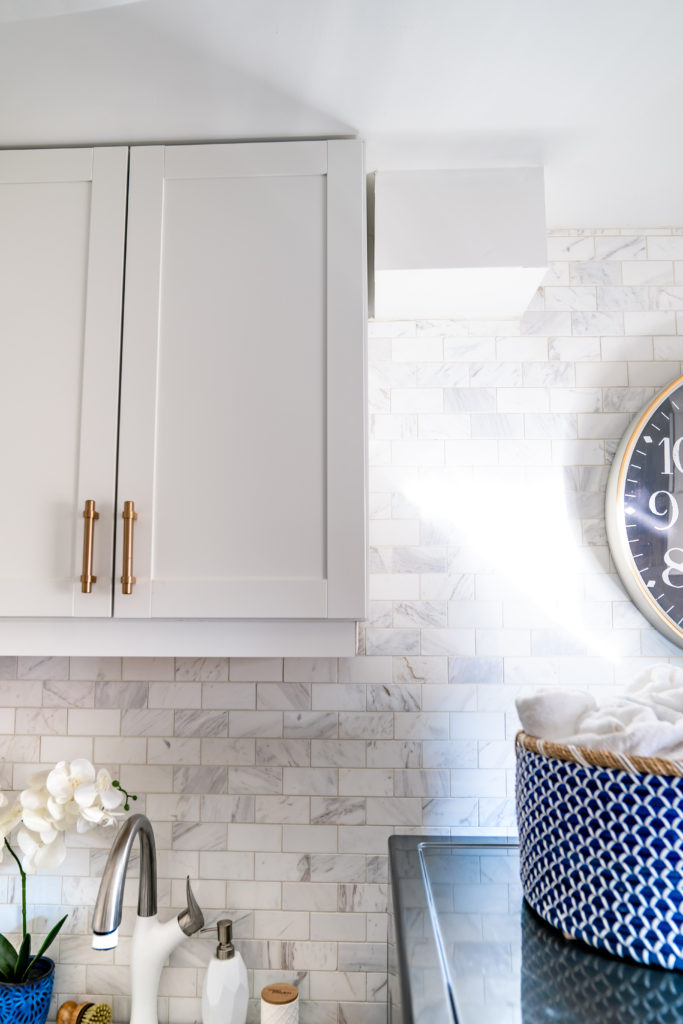
We also faced a few odd spaces, like the spot on the upper cabinet of the built-in where the crown moulding and the cabinet meets. There’s a gap and we just weren’t sure what to fill it with, so we left it.
And that’s the difference with custom builds and home DIY’ers! LOL! We try our best to make our rooms look amazing, but the fact of the matter is, we aren’t carpenters and aren’t experts at every single aspect of these home renovations.
So when we talk about what we would do differently next time, hiring in a “finisher” is one of them.
Well there you have it friends, six lessons learned/updates five months after our laundry/mudroom renovation. Like I said, we still LOVE LOVE LOVE this space. It’s the nicest room in the house. But there were some definite challenges when renovating that I felt we should also share, alongside all the beautiful, polished images. Sometimes it’s easy to look on Pinterest and just see these perfect, completed spaces and think your space just sucks in comparison. It doesn’t. Like anything, home renovation takes years to get right from lots of practice and learning. This was actually our first ever gut job – taking a room down to the studs and rebuilding it. We learned SO MUCH and I hope after this post you can see that it wasn’t all smooth sailing…and that maybe you’ll be ever-more inclined to take on your own renovation project knowing that the challenges and imperfections are all part of the process and give your space it’s truest character!
Love & Blessings,
Christine