My daughter turned five last week! And like every other girl on the planet, she’s been begging for a Frozen-themed birthday party since the minute she watched the movie! As an event planner, though, I’m not a huge fan of doing such literal character parties. To be honest, before I had kids, I said they would NEVER wear character clothing. Ya…that changed pretty quickly! You realize just how much your kids LOVE these characters and how real they are to them…and once you start seeing the world through their eyes, you kinda start to love those characters too!
So when I set out to start planning this birthday party, I knew that while I was going to incorporate the characters from the movie to some extent, I wanted it to be a unique twist on a traditional Disney Frozen party. Let me walk you through the various elements of the party! Also, I want to use this post also as a somewhat educational tool for the many of you who ask about how I party plan. I will be adding tips all throughout the post!
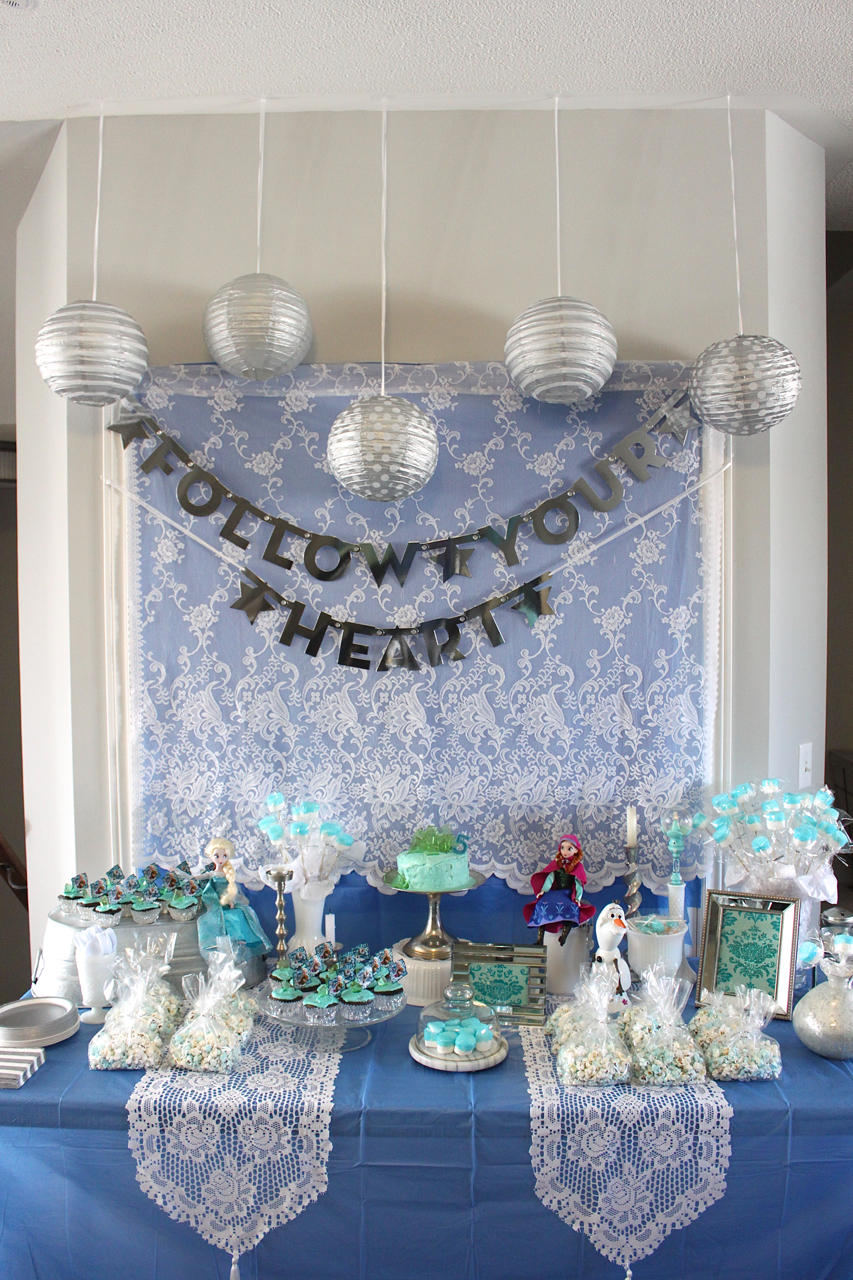
So I focused more on the “ice” theme complete with colors of white, all shade of blues and silver! I wanted it to have that snowy, freshly-frozen iced feel to it. So with all those ideas in mind, I set out to start collecting! Tip #1: When you are party planning, it’s really important to have a concept/theme, and colors in mind before you start buying items. If you don’t, you will likely end up in a store and be so confused and frustrated because you don’t know where to begin.

As many of you know, my absolute favorite store is Target. I, like many Canadians, was absolutely devastated when they announced that they were closing up shop here in Canada. I have been a faithful Target shopper for years as we would spend many winters down south in Florida. I understood the Target brand and when it came to home decor and party planning, this was honestly my go-to place. So as they started liquidating their items, I naturally bought up most of the store! Both banners “Follow Your Heart” and “Happy Birthday Leah” all came in one box set from Target! Also, the globe paper lanterns, plates and napkins were from there as well. Tip #2: When purchasing items for an event, make sure to buy more then what you think you need and keep your receipts. You don’t want to run out of something only to realize the store no longer has it. It’s much easier to return items after the party then be in a panic searching for more.
My daughter asked for me to make her a 3-tiered cake. Of course, I didn’t want to let her down. So I baked my little heart out the night before, whipped up three different batches of icing (it was going to be a blue ombre cake, with each layer getting lighter and lighter). The plan was set into motion, the only problem is that my cake found some motion of its own and eventually fell off it’s cliff! Literally! The whole thing fell apart! I have no idea why this happened (I’ve googled it a bunch of times…I now have what I think is the perfect recipe for next time!) I was SO upset that it wasn’t working out. The hubby kept saying “Just give up on the cake and let me go grab a slab from the grocery store!” NO WAY!!! Not in my house. Not at my party! There will NOT be a slab cake! As you can see, we ended up with one layer…better than nothing…and definitely better than a slab!
 The second thing to go “wrong” was my “ice” candy. Again, I spent many hours with Mr. Google and Mrs. Pinterest trying to find the best recipe and technique out there, all of them varied slightly. My first attempt totally failed…the sugar never hardened. Went back to the drawing board and realized that it wasn’t my candy thermometer that was broken, it just really does take 30+ minutes to get boiling sugar to reach 300 degrees! Second time around, it worked like a charm, however, our “ice” turned emerald green rather than a beautiful blue. Oh well, at the end of the day, this is all about “magic” so why can’t we have green ice?! Tip #3: When trying various recipes you find online, particularly specialized ones for an event, make sure to read below the recipe in the comments that people have left. I often find those comments to be SO helpful and adjust the recipe according to what readers have tried. That’s how I realized my ice candy didn’t get hot enough the first time and why it worked the second time!
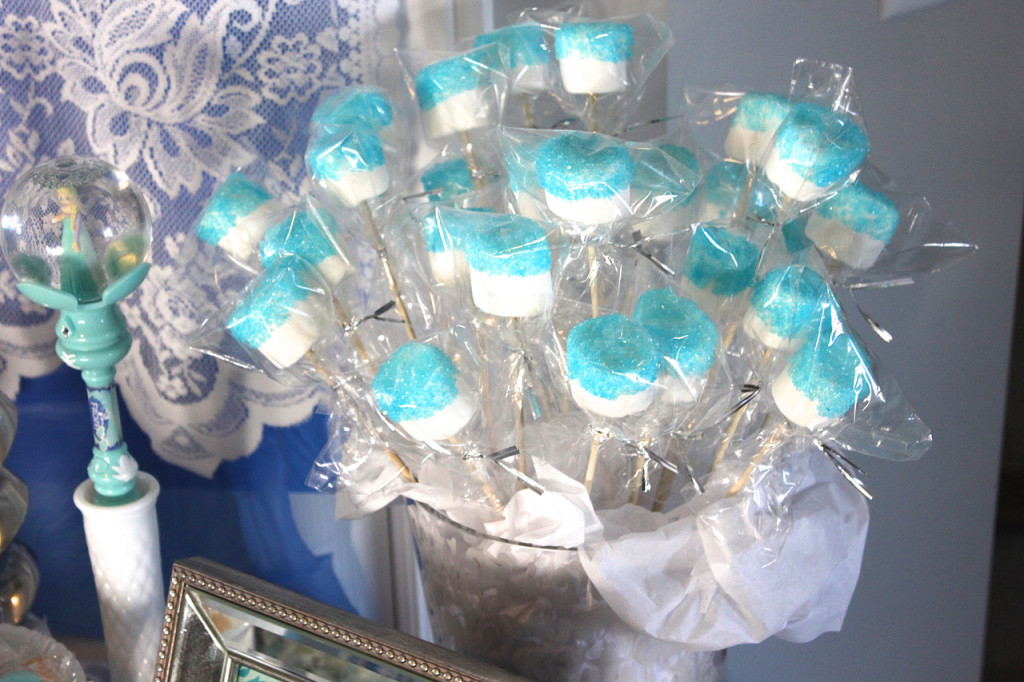
We had ice glacier marshmallows. This was super easy! All I did was dip the marshmallow halfway into water and then dip it into colored sugar and let harden overnight. The next morning they were crisp and I was able to spear them and bag them! They were a huge hit, especially amongst the kids. You can get colored sugar at any bulk food store, like Bulk Barn.
Our other snack was blue mountain popcorn! All I did was pop regular popcorn and then melt Wilton’s melting chocolate in blue and white and mixed it all over the popcorn! Gave it a really fun, sweet flavor! Tip #4: To help keep costs down, make as many of your own snacks as possible. Items like marshmallows, popcorn, cupcakes, cookies, etc., are all so cheap to make and then you can add in various colors in your toppings to incorporate the theme!
The definite snack “hit” were the snow cones! I was fortunate enough to find an online momma, through a local Facebook group, that let me borrow her snow cone maker! I loved how the it really tied in “ice” theme in throughout the party. The kids (and some adults) were lining up for these icy treats!

For entertainment, we did a craft: crystallized snowflake painting! For the craft, we simply took black cardstock and then made a mixture of equal parts hot water and epsom salts (make sure the salts are all dissolved) and had the kids paint their cardstock. As the paper starts drying, that’s when the magic really happens! The epsom salts crystallize and it looks so awesome! Everyone was so amazed with how it turned out and it was such an easy and inexpensive craft! Tip #5: When planning activities for a birthday party, remember to keep them simple. They will be so many kids to manage and energy will be running high. So something that is easy and quick is the perfect combination, especially for younger children!


Finally, no Frozen-themed party would be complete with a visit from the Ice Princess herself! We had Queen Elsa stop by for a magical showtime! From the moment she rang the doorbell, the squeals and giggles from all the kids were so heart warming! She sang some songs with them, read them the whole Frozen story, did face painting and then took pictures with all the kids. She even had a few special gifts for the birthday girl! If you live in the Greater Toronto Area, you will want to check out Queen Elsa of Durham for your Frozen party! Here is her Facebook page. Tip #6: When trying to find entertainment for a party, try looking on Facebook ads or in local listings, such as Kijiji or Craigslist. Obviously, you need to make sure they are reputable, but I really like the idea of working with local, smaller businesses to help support them. It’s usually a much more personal experience where everyone benefits!
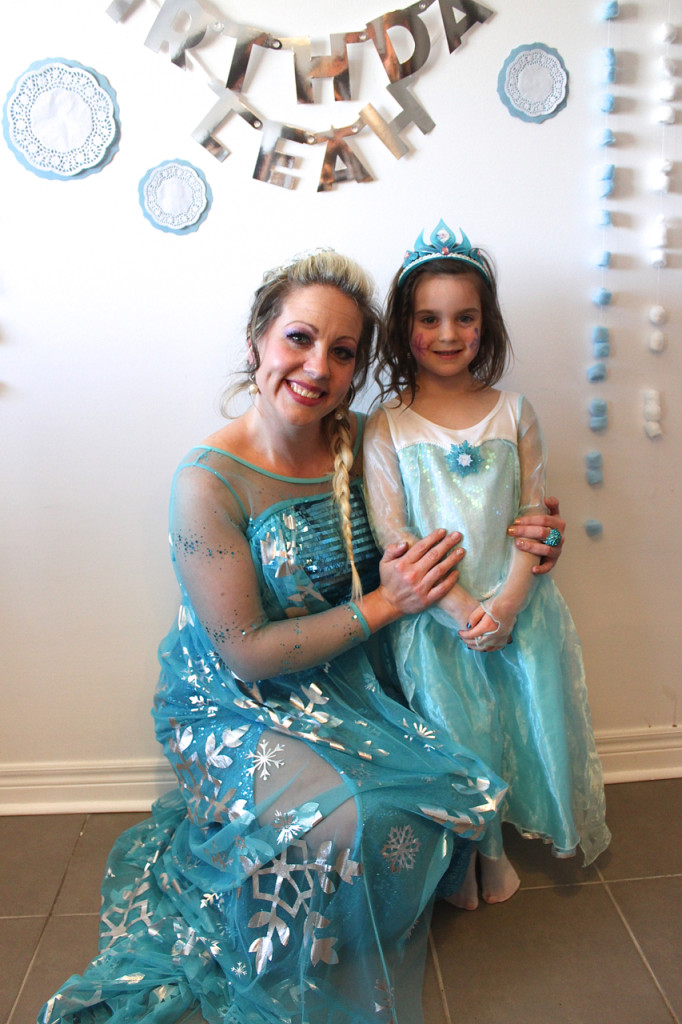
And there you have it, our Frozen “Ice” themed birthday party! I am really pleased with how it all turned out! We have a much smaller space then we used to have so it does get crammed when everyone comes in, but that’s not reason to stop me from having a big bash (and shouldn’t stop you either!)
I wanted to leave you with one final tip for your next party, Tip #7: When planning the decorations for your party, don’t be limited by the pre-packaged stuff that you see in the stores, especially when it comes character parties. Be creative and let your mind soar! Shop your house first and see what you can use that works with your theme. I used picture frames from my room, coffee canisters from the kitchen and candles sticks from my table! I also used old lace from a previous party for the backdrop and table!
I will do a larger and more detailed post in the future on the specifics on party planning, but I hope you’ve been able to grab a few tips to keep in mind for your next big event!
Love & Blessings,

