Welcome to Week 2 of our Bohemian Glam Office Renovation! If you missed last week, make sure to check it out here, where I shared all about the inspiration and mood board for our upcoming renovation!
Today I’m sharing with you the dreaded “BEFORE” pictures of the space. I absolutely hate sharing these online, which likely explains why I’ve been putting off this post for a few days. The only time I like sharing “before” pictures is when the room is completed and you can see just how far we’ve come in the renovation!
So before I share the “before” pictures (that sounded weird), let me talk you through what this space looked like prior to our kitchen renovation last Fall. This side of our home had two rooms, one in the front and one in the back. The two rooms had an opening between them that I assume at one point had doors in that opening.
If you have followed along our journey since purchasing this home three years ago, you will know that this home is almost identical to my childhood home that I grew up in in Ottawa, except the mirror image of it. Growing up, the “front” room was the formal living room. There were two sets of french doors – leading into the room from the front entrance of the home and then separating the living room from the back room, which was the formal dining room.
When we bought this home a few years ago, the house was set up similarly with the front room being a living room and the back room a dining room. While we have had two separate living room before, we never have had two separate eating spaces in our homes before. We also knew that we needed a home office and that front room seemed like the perfect space for it.
We knew almost immediately that we wanted to tear down the wall in the kitchen to double the kitchen space and expand into that dining room. You can read more about that design plan in our kitchen renovation here. But it was at that time when designing the floor layout for the kitchen space, we had to decide what was going to happen with this front room. That’s when the decision was made that we were going to close up the opening between the two rooms in order to facilitate a bigger space for the kitchen and a closed off office space in the front.
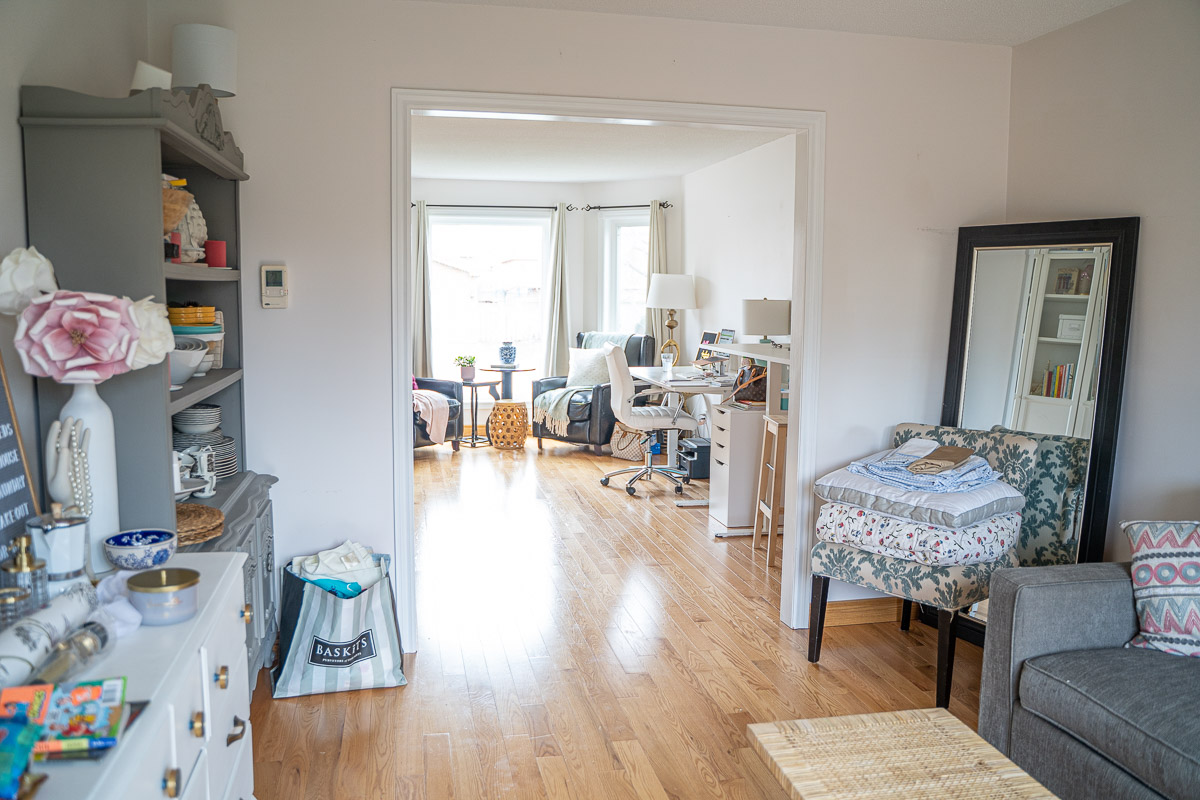
This is what the space looked like before we did our kitchen renovation. You can see that we tried our best to set up the front office space, while the back room was always just a bit of a catch-all space with a random couch and a few hutches!
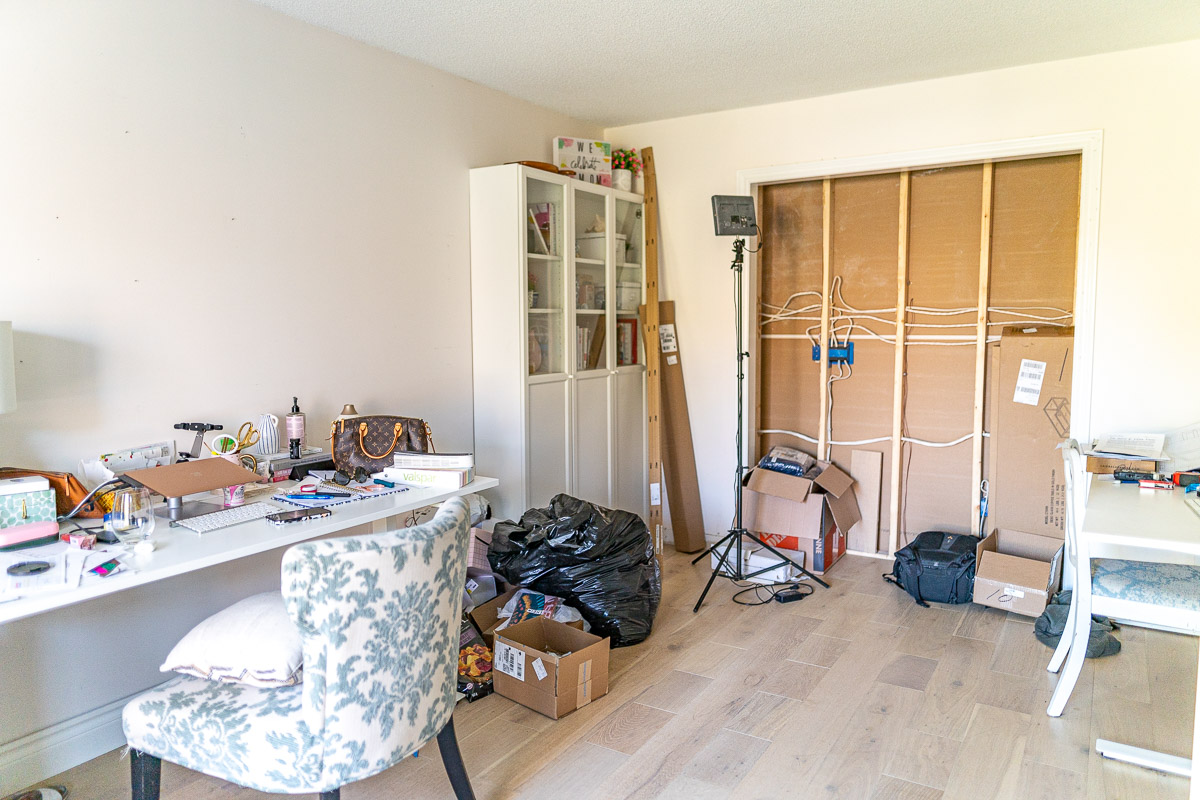
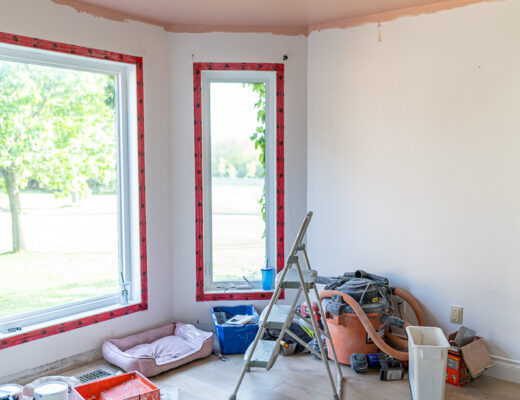
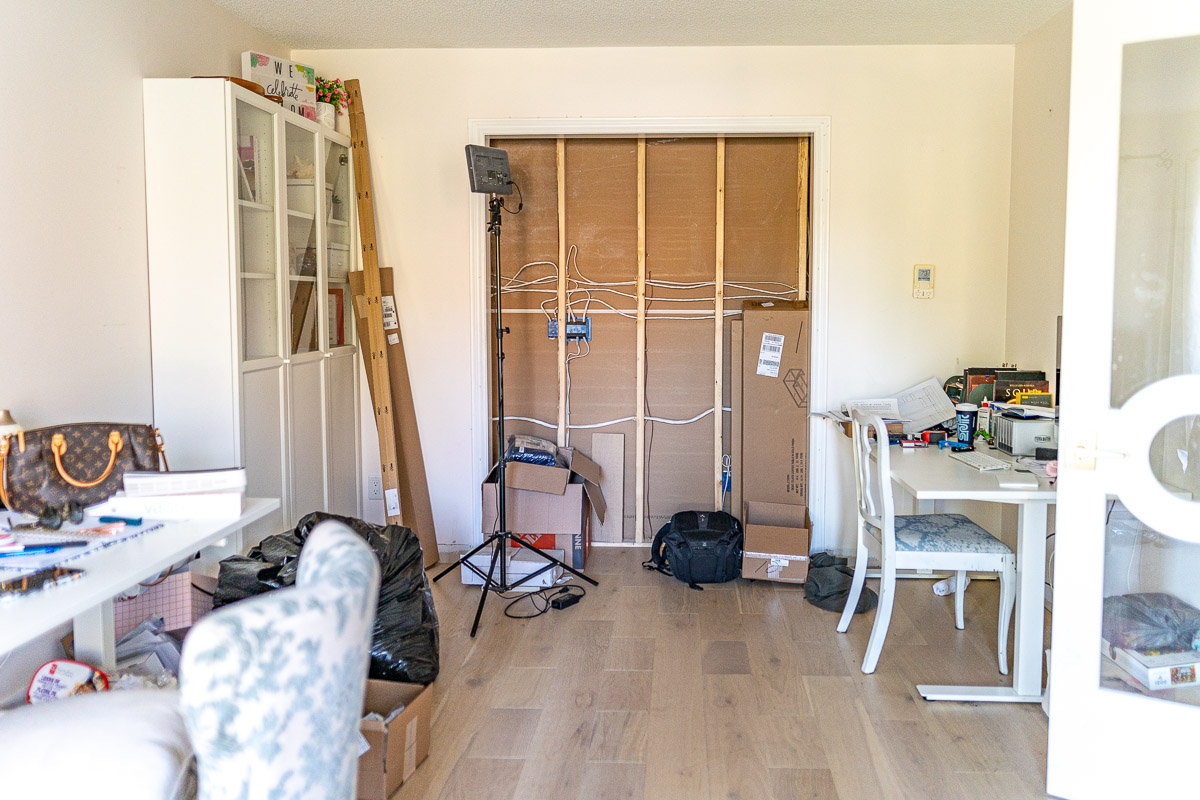
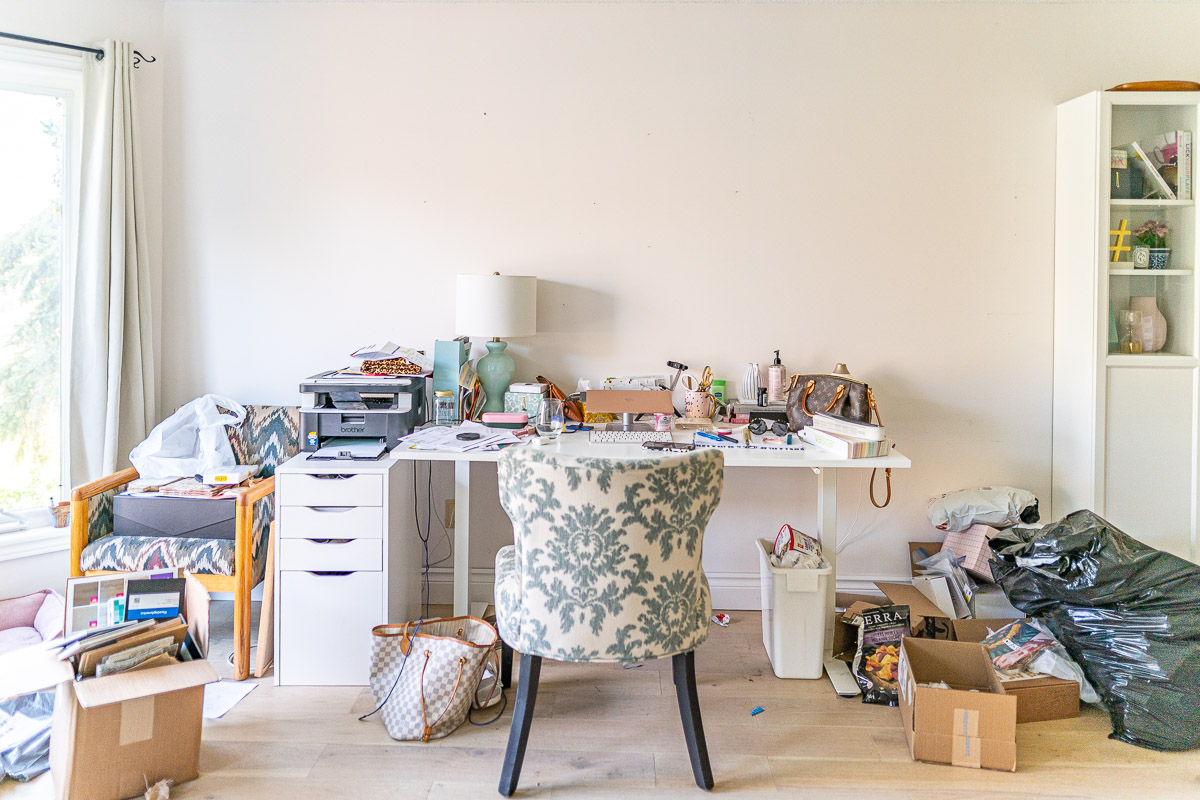
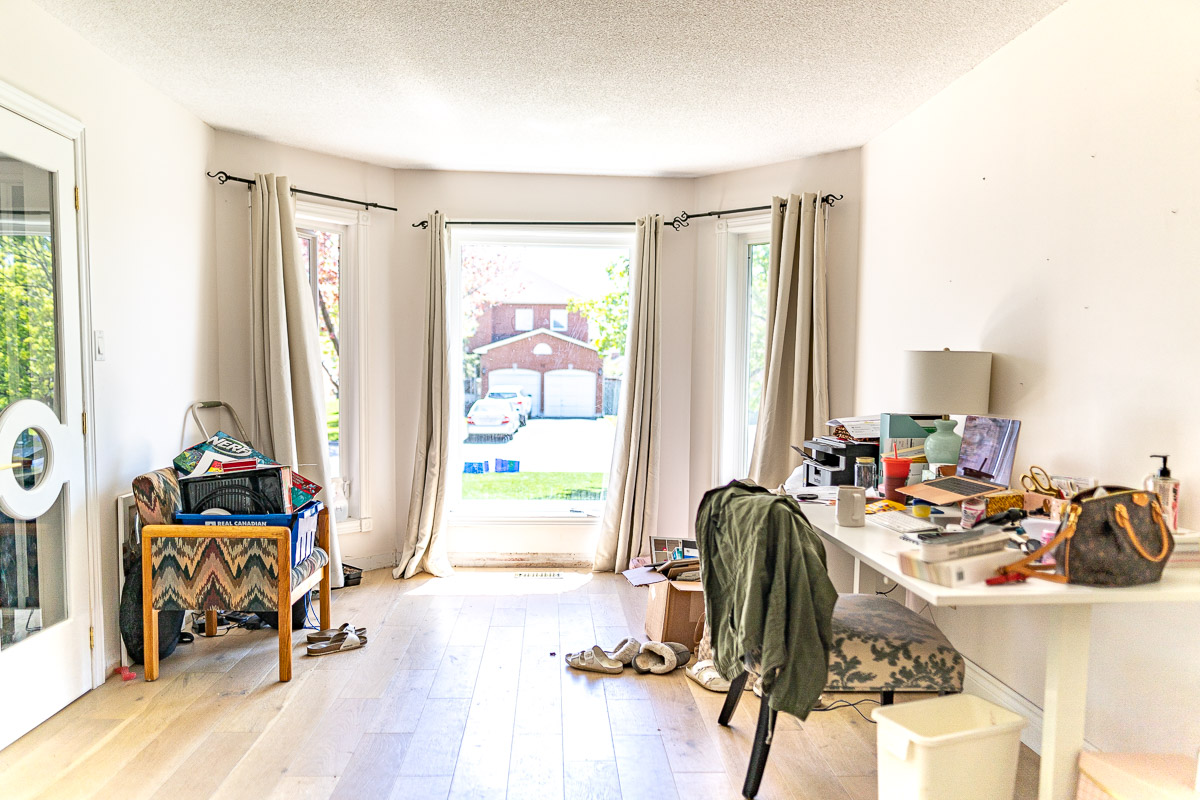
So here’s what the space looks like today. It’s pretty bad! We haven’t closed up the other side of the wall since the kitchen renovation, so there’s still a bunch of exposed wires in the wall #safetyhazzard. And you can also see that we’ve somewhat given up trying to keep the space organized or clean. As our kitchen renovation was nearing the end, we found that we just kept stuffing things into this office space that didn’t have a home. For months, the extra items we had from the cabinets that we got at IKEA sat in this space as the store was on lockdown and we couldn’t return anything.
OMG I still can’t believe I’m putting these pictures on the internet! SO BAD! But alas, here is where we are starting. So let’s talk through the plan:
- Remove popcorn ceiling (this is our first time attempting it and I’m SO excited)
- Build a built-in desk and wall unit to close off the exposed wall. This will function as desk space as well as some much needed storage
- Create a seating area in the front bay window
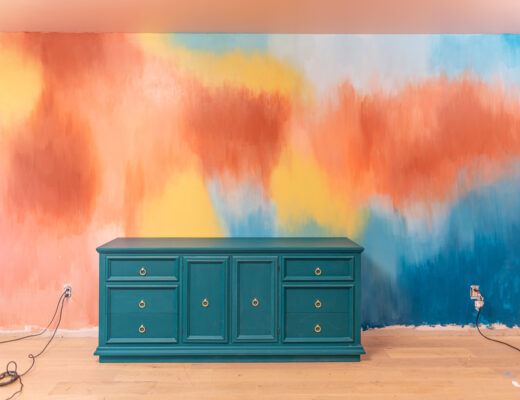
- Paint custom mural wall along the large wall
- Refinish some furniture to include in the space
So, what do you think?! Pretty bad eh?! I guess the good news is that it can ONLY go up from here! I’m pretty confident that the reveal will be QUITE the contrast from what you see now, so make sure you are following along each week to see how this space transforms!
Love & Blessings,
Christine