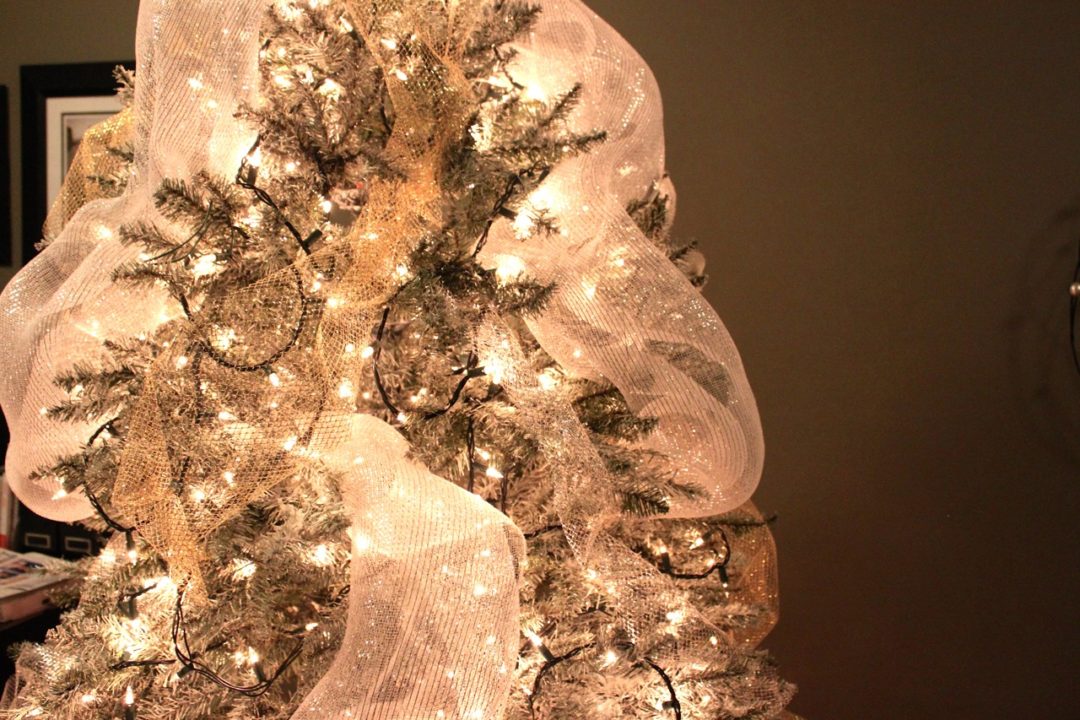
Welcome back to Day 3 of our Decorating Your Christmas Tree Series! Today we are talking “How to Put Ribbon on Your Tree.” Well, technically, I’m going to show you to put Christmas mesh on your tree because that’s what I decided to do this year. BUT, the technique is the exact same!
Over the years I’ve used all kinds of ribbons, in varying sizes, as well as burlap. I’ve also tried varying ways of placing the ribbon on my tree. Let’s take a little look back, shall we?

Here is the evolution of my Christmas tree, over the years. Same tree, just added in more decorations as well as changed up my ribbon technique. My very first year, I wrapped my ribbon around the tree, in a circular way, but I can’t seem to find a picture of that.
But what you can see in these pictures is how much of an impact not only ribbon but PROPERLY placed ribbon makes. For starters, adding in a secondary ribbon makes a HUGE difference (note the difference between the first two pictures). But then in the middle two pictures, I was doing long strips of ribbon that started from the top and cascaded down. Then by the last picture, I finally figured out “my way” of doing ribbon and that’s what I want to share with you today!
Like I have all this week, I did a video tutorial to show exactly how this technique is done. I don’t have many pictures of the process but the video shows it all. But let me talk you through it quickly.
 For starters, select two ribbons or mesh that you want to use. I think it adds so much contrast and interest to your tree to have varying colors present.
Next, you want to CUT the ribbon/mesh into smaller pieces, no bigger than three feet long. I know you are probably thinking that sounds CRAZY to cut such beautiful ribbon, but trust me, that is going to yield the best results on your tree. It’s going to look more incorporated and organic. My thoughts are, you shouldn’t really be able to see where the ribbon starts and stops. You want it to be so well incorporated into the tree that it almost appears as if it was always a part of the tree to begin with. That is achieved through CUTTING the ribbon and working with smaller sections.
Then when you go to start placing it into the tree, just be very organic about it. Look for holes that need to be filled and fill it! Don’t make your ribbon all go the same direction. Place one going down to the left and then the next one to the right. You don’t want it to look uniform, but rather very natural.

One tip when it comes to adding ribbon/mesh and truthfully any other decorations, is to always step back after each item you place and really look at how your tree is taking shape. While not trying to have it “perfect” you do want your tree to be well thought out but with a natural feel. The best example I can give of that is when it comes to artistic athletes, like figure skaters or dancers. The goal is to make it look effortless. However, they have put HOURS and HOURS and HOURS into practicing to get it to that point. In a similar fashion, when it comes to your tree, you don’t want it to LOOK over-staged or perfectly poised, but for that to happen, you are going to have to take the time to really think through your game plan. Some of you might be laughing by now that I put THIS much effort into my trees, but trust me, it’s what makes ALL the difference. I will get more into that TOMORROW when we tackle flowers and ornaments and how you want to know everything you have to work with BEFORE you start placing it on the tree.
So here is the video below, to show you exactly how I worked with the mesh this year. It really is the exact same technique if you are working with ribbon or burlap. Cut into smaller pieces, weave it out from the back of the tree and let it “fall” into place (with a little help from you!).
I hope you guys are enjoying these video tutorials! I never knew how long it took to make and edit them…but I am enjoying sharing them with you! And I promise you that by the end of the week, I will make myself look more presentable and not like I just rolled out of bed! HA! Just trying to keep it real here, folks!
If you’ve missed the first two days, make sure to check out Day1: How to Flock Your Tree and Day 2: How to Put Lights on Your Tree. And make sure you come back TOMORROW for Day 4: How to Place Flowers and Ornaments on Your Tree!
Love & Blessings,